
Paper waxing is fun, easy, and a really quick way
to do something different with your papers. I tried it a while ago and
took photos of the process, so now I'm able to make my first tutorial
ever.
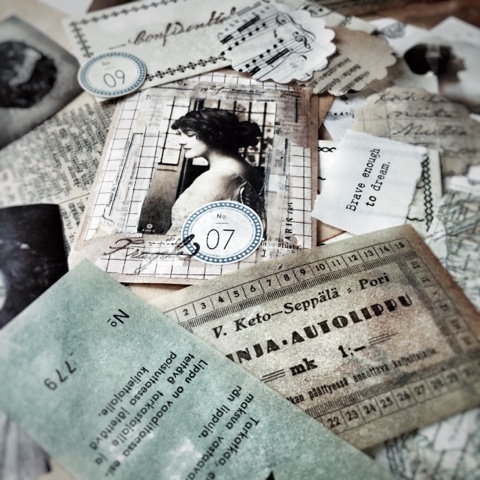
I tried to wax vintage tickets, Classiky papers,
tissue papers, silk papers, book sheets, Lamp x Paperi stickers, coffee dyed
papers, even a collage I made using washis, stickers, and glued papers. I also
tried how stamp ink and laser printed paper react with wax. Quite fine, I
think. Even the glue, washi, and stickers hold. Different papers have different
textures and I found some absorb more wax, others less, and they react with
heat differently.
This is how I did it, and please feel free to have different methods, and, please note that this is a very unofficial way of doing it. I just figured out it could work like this.
This is how I did it, and please feel free to have different methods, and, please note that this is a very unofficial way of doing it. I just figured out it could work like this.
YOU'LL NEED:
- papers you want to wax
- old candles, crumbled to small morsel
- baking sheets (at least 3 sheets)
- kitchen paper roll
- iron and iron board

HOW IT WORKS:
1. Pick the papers you want to wax. Spread a
baking sheet to the iron board, and put your papers on the sheet. Spread candle
crumbs on the papers, and add another sheet on top. Spread another sheet on the
table near you for the waxed papers.

2. Heat the iron, and iron over the sheets.
You'll see how the wax melts and spreads on the papers. You might need to
adjust them a bit and add some candle crumbs if the result is uneven. (Or, do
it like me, and let it be just as it turns out. Different textures, different
out comes are all welcome.)

3. Pick the waxed papers and put them to cool on
to a baking sheet or paper or whatever you want to use, but please note they
are a bit creasy, so you might want to cover your table.

4. After cooling, check if there is too much wax
and put the papers between two kitchen papers and iron once more, this will
absorb the extra wax.

WAXING STAMPED AND LASER PRINTED PAPERS:
I noticed the result is betters if you put the
stamped or printed side of the paper towards the iron board. This might prevent
the inks to spread with the wax. I tested this several times and noticed that with
our printer inks, the black ink has a bit larger tendency to crackle than other
colours. So, test your inks with a bit less valuable pictures. I found it
rather charming how an uneven and crackling outcome of the waxing process makes
the pictures look like vintage photos.

I hope you like the waxing as much as I do! Experiment with different textures, colours, prints... I'd love to see how your waxing turn out! Tag me in Instagram @harvinaisenkauniselama or leave a comment, thank you dear!
No comments:
Post a Comment